Here are some pictures of the things I've been working on:
This black Mannix Les Paul is awesome with 5 strings. It weighs about half as much as most LPs, which makes it really comfy. Controls are bass cut (bottom left), pickup select (top left), treble cut (top right; I need to change the cap in this one, it cuts too much), and master volume (bottom right). The red button where the pickup selector is normally positioned bridges the two sides of an extra jack I have on the back, which I use to trigger my freeze pedal. Also bizarrely it works as a keyboard sustain pedal. The neck pickup is stock (still a bit wooly) and the bridge pickup is a hot strat one with nice bite. Has a monthly train ticket around it to fill the space that the humbucker used to. Standard tuning, occasionally drop D.
Nice wide shot of most of my gats. Vester bass, Yamaha classical, uke, Squier strat, cricket bat, 3-string, travel guitar and my Les Paul.
This is my awesome little travel guitar. It lives in standard tuning and is surprisingly comfortable. It wasn't quite right when I got it so I got out the dremel and cut a hole for a cheap strat pickup. Acoustic guitars don't have grounded metal bridges like elecrtics do so I put in a nice thick piece of copper that touches the strings between the pins and the bridge.
No controls on this thing, just the single coil straight to the output jack. Beautiful solo machine. You can hear it on
this track.
This ugly motherfucker is my main squeeze. It's got three (slightly thicker than usual but not too much) strings, in drop C#. Started life as a steel acoustic. Controls are a bass cut (left) and a volume knob (right). I don't like to use them and I don't need them often, but sometimes I need a little more bite or a little less grunt. The pickup is really hot too so it's all it needs.
In my endless quest to stop all unwanted rattles I had to take the other tuners off, jam a pick under the truss plate, put fabric between the strings, and cable tie the low string's tuner. I'll put some nice electric tuners on it sometime.
I scalloped these to get a brighter tonal colour in my higher frets. Very useful for high solos on three strings.
As you can see I got a little bored. The tape is over a piece of foam, it forms a cushion for my ribs. the velcro is for pedals. It's awesome being able to change your delay time without having to reach down.
Couldn't reach the high frets well enough so the body needed changing. Didn't quite get around to filling in the gap, came to love it instead. It's useful for maintenance and it's fun putting my hand out the soundhole.
This is much the same as the travel guitar, the strings needed grounding. Took me way too long to figure that out.
Foam jammed in next to the pickup to curb the pesky rattles.
I don't like sharp edges digging into my arm so I sanded off the edge. Rubbed some wood glue into it to try and improve the strength. It's cracked a few times when it's been dropped, but despite how dodgy and delicate it seems it's actually just fine.
Made a neat cross for my strap out of old network wire.
This cricket bat guitar was one of my first builds/mods. It's a polyethylene hollow cricket bat with a plywood fingerboard and no frets. It's got three strings in a C# minor triad. There's a piezo pickup under the bridge which sounds really nice. Total build cost was like $15.
I cut a bridge from an acoustic guitar in half and used one half for the bridge and one for the nut. The action is ludicrous but it works well for slide stuff. The white plastic is shower liner and the screws came from nerf guns.
Output jack and on/off switch. Keeping it simple.
This soundhole took ages to drill but it came out well.
Neck/head.
Reversed some cheap uke tuners so I didn't have to angle the head.
Tension is formed by the strings passing over the nut and then through holes in the head to the tuners.
Nice solid bolts hold the strap in place.
This is a (very) cheap uke I got from the rockshop for $30. It's gone through a few changes but it's always been blue. Unfortunately the more I play it the smaller it feels.
Made a pickguard from scrap plastic.
I plugged the soundhole with the end of a table leg that I found, calculated the area and cut a hole the same size in the side. This stopped it feeding back and made it a little louder acoustically as there's more top to resonate.
This one also suffered from scraping my arm too much so it got the same sandpaper treatment.
There's a piezo under the bridge, with a volume knob and jack on this plate. The strap pin is mounted here too. The pickup doesn't sound as nice or as loud as I'd like, so I use it almost exclusively with a bass/clean boost and an octaver.
The wire round the side is to make it more comfortable, particularly when sitting. It lifts the uke from your leg and puts the strings where guitars naturally sit. When standing it also allows you to rotate the instrument slightly by moving your leg.
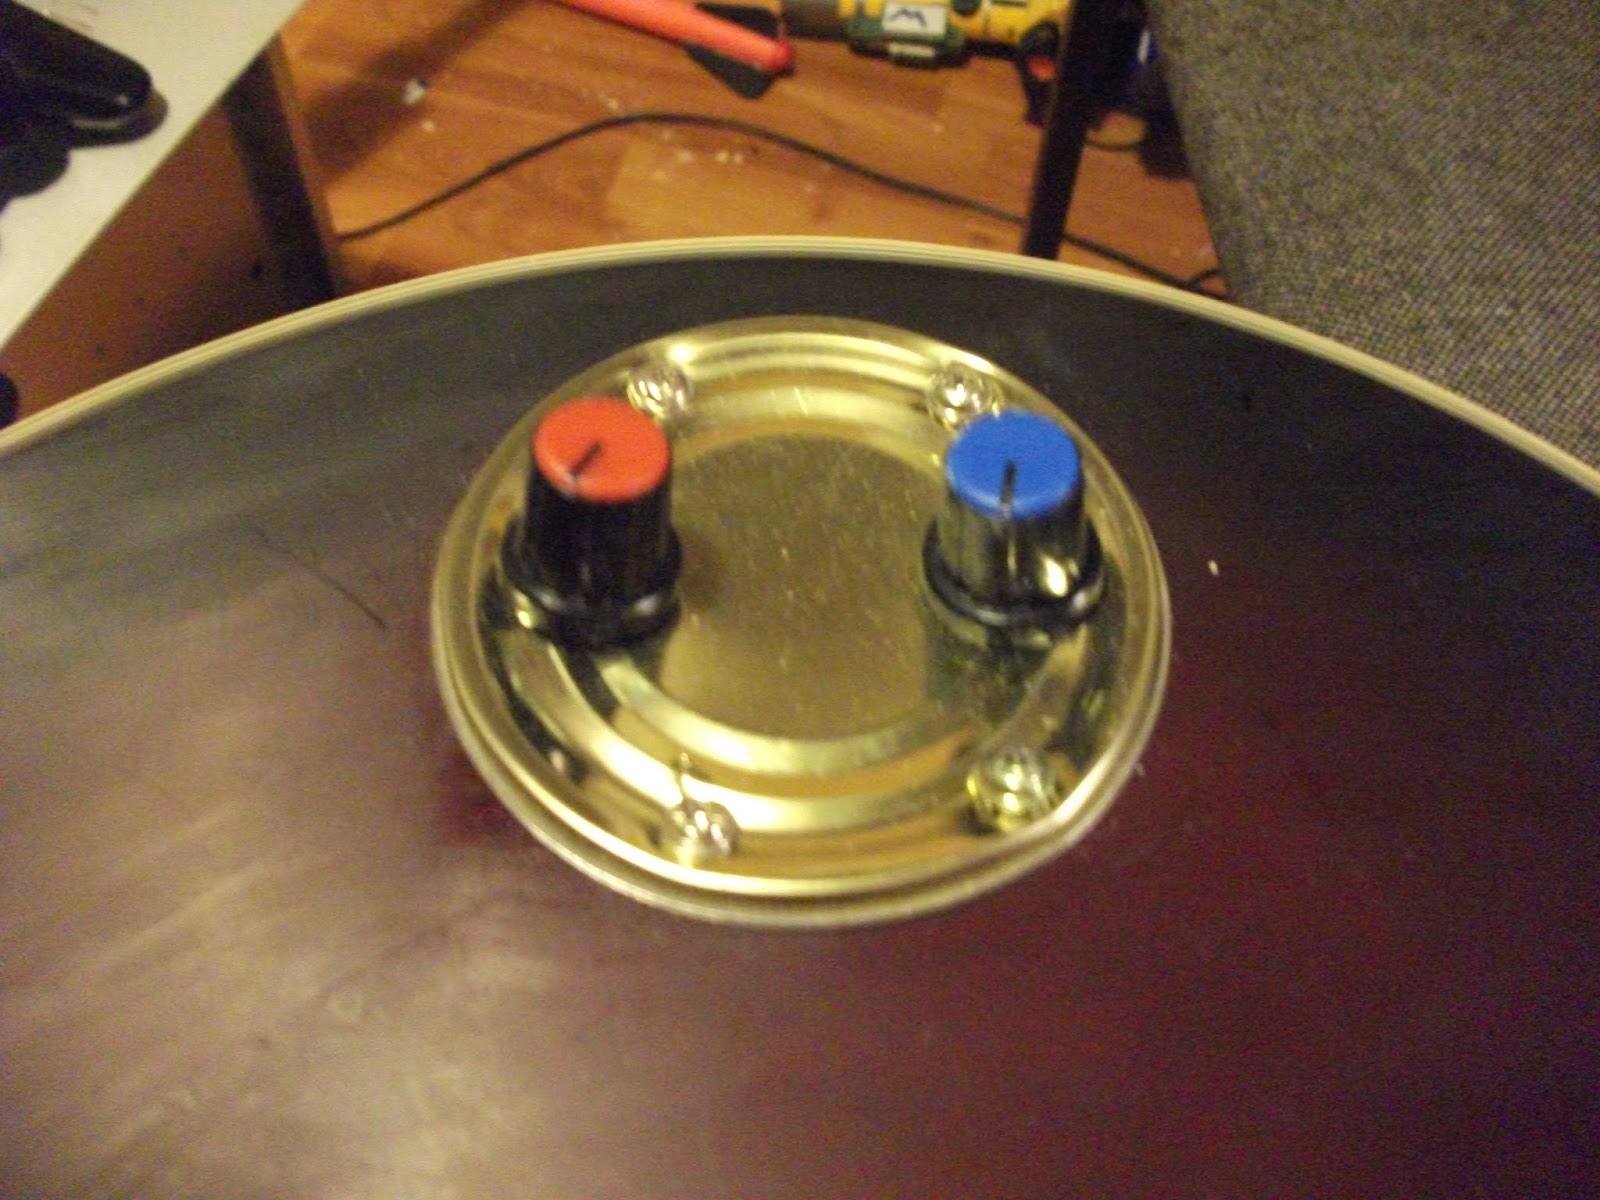
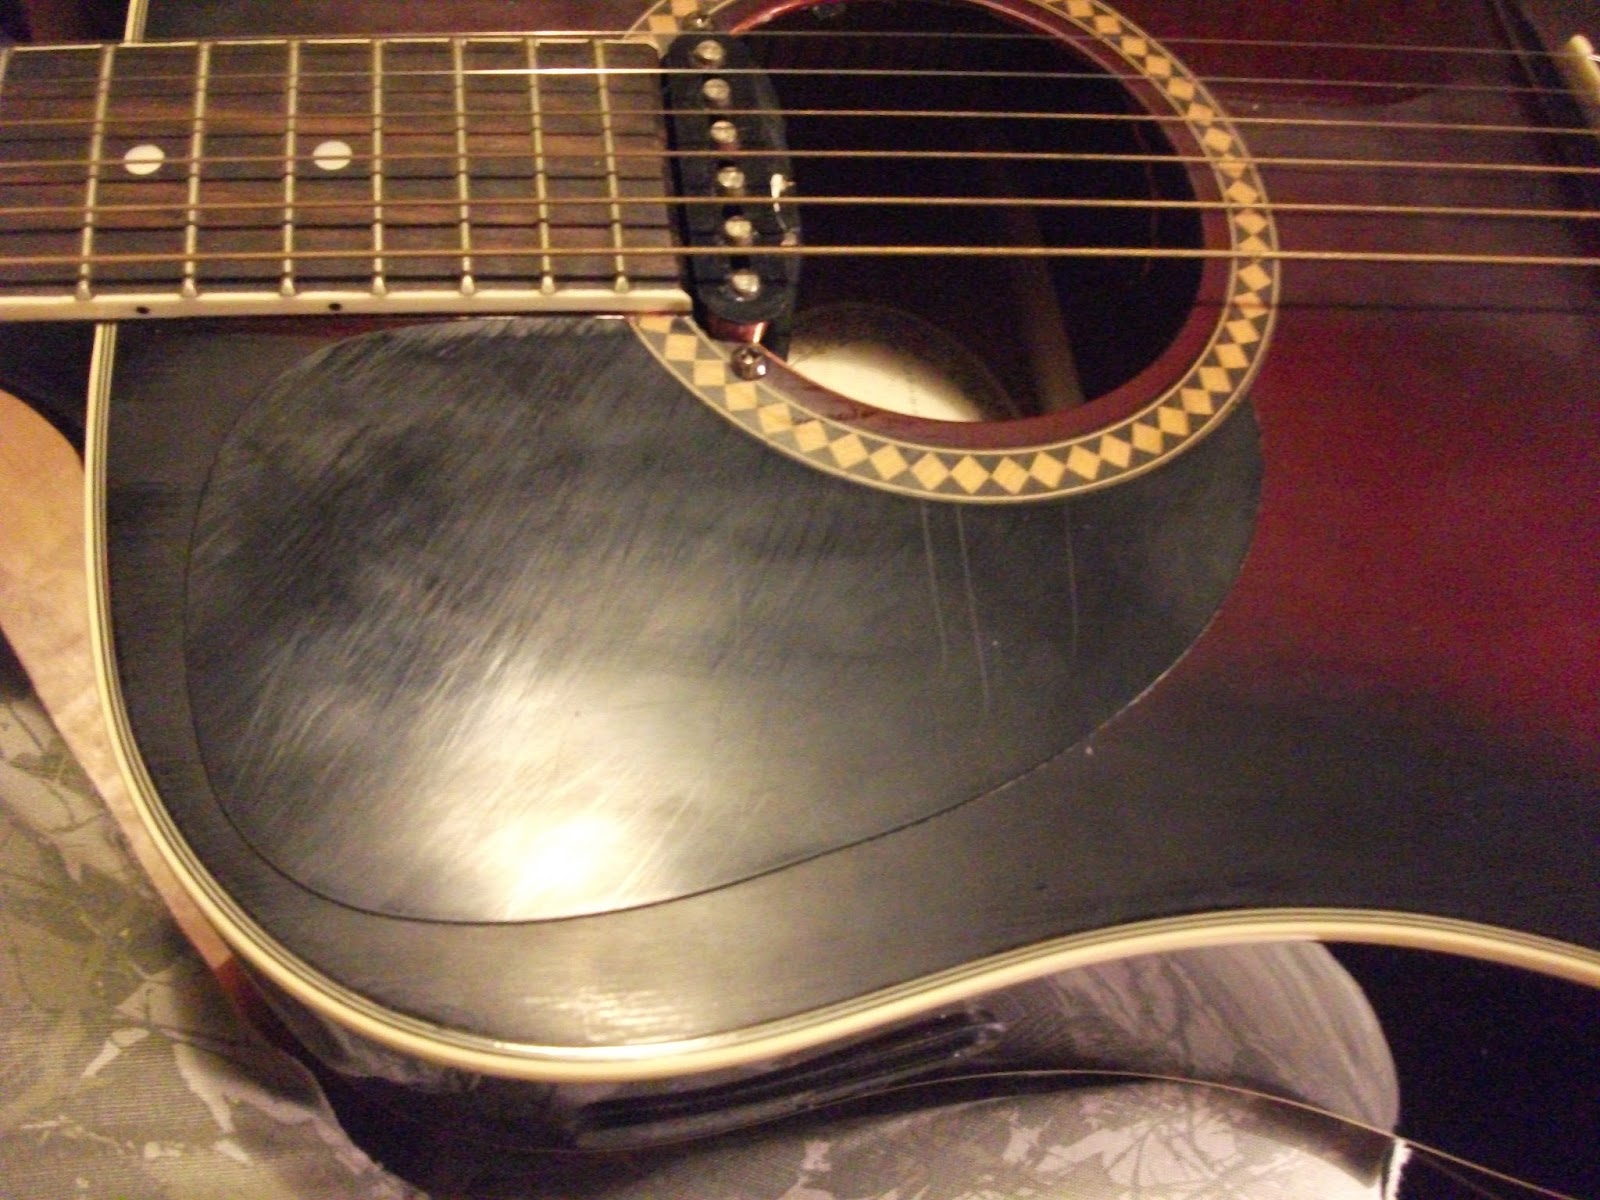
This is a cheap Ashton dreadnought my mate gave me. It's way too big to be practical and sounds uptight and horrid when it's in standard tuning. In C standard, however, it's rather excellent.
Fitted a nice mellow strat pickup in the neck position. I was thinking about something more powerful but it works really well to let the resonation of the body drive the sound rather than having more interaction with the steel.
Tin lids are cheap, plentiful, good at grounding/shielding and incredibly easy to work with. Also just looks cool. Controls are coil volume and piezo volume. It makes some weird noises sometimes but it allows a huge amount of interaction with feedback-based composition.
More acoustic bridge-grounding.
The pickguard was boring so I moved it. I might get another one in white, make it a yin-yang or something.
This gat is way too big so it needed some serious sanding to make it practical. Looks cool too.
This is a busted danelectro pedal I'm gutting to make an optical tremolo, similar to
this one.
I've dremeled it out and mounted the motor. It's got a ways to go but it's getting there.
This is a small classical beater guitar my mate lent me. The finish was pitted and horrible so I've sanded it down. Gonna stain it green and (hopefully) handwind a lipstick tube pickup for it, in the middle position. I'm making a new bridge and nut for it from some scrap rimu; it's gonna run four thin steel strings at low tension. Not sure of tuning just yet but it want it bendy and slidey. There's no truss rod so I have to be gentle.
The head had a nasty crack through it so I drilled a hole and glue a homemade dowel in there. Clamped it overnight, it's fine now. I'll probably refinish it when I stain it.
The loose saddle with my rimu bridge blank.
Painted my laptop because it was boring and grey. Much better now :) I used acrylic and clear-coat.
The strap allows you to put your feet up and hang the laptop off your knees, which is supremely comfortable.
This is the template for my new ukulele. It's a bit bigger with a 450mm scale length. It's gonna be built like a strat with a flat body and front-loaded electronics, all mounted on the same plate. It's got a cut-down strat bridge (with a whammy bar) and I'm gonna make some homemade pickups. I'm thinking one lipstick tube in the middle/bridge and a single-coil in the neck. Maybe a stacked humbucker.
The body will be two pieces of rimu with a bolt-on neck made from the same piece of wood. I'm thinking a green stain with a yellow anodised aluminium scratchplate. It's gonna take a lot of work but I'm hoping to get it done before uni starts up next year.
This is a terrible photo of a suling (flute) in the pelog tuning that I made for my Gamelan class.
It's made from cheap polyethylene pipe (never using that stuff again) and a rimu plug. The fipple was tricky to cut but it's playable. If I get around to it I'll carve a new fipple, but out the old one and glue the new one in.
The tone holes look a little odd but the pelog scale that they form is beautiful.
Pedals! This isn't all of them but it's all my favourites. Crowther Hotcake, Ibanez (bass/clean) boost/tube screamer (not modded but it needed the power converter replaced a few times), Marshall Guv'nor, EH Freeze (modded for external trigger, more mods coming), Danelectro FAB Delay (mods incoming), Mooer octaver, Ashton chorus (surprisingly nice). In front there's my BOSS RC3 with the control pedals I made for it. My Strymon BlueSky is probably the nicest reverb I've ever heard.
Behind the other stuff there's my homemade 6-channel true-bypass box and my
cheap DI box. The DI has been modded a bit; I took out the volume knob and replaced it with a jack that doubles the A channel. It's useful because with two channels you can do all sorts of things, like running mics through it and using one side backwards.
These things are fun little gadgets I made from eclipse tins. The red one is a voltage dropper; it's just a pot and some power jacks that allow you to starve pedals. Based on
the Beavis devolt. The green tin is a motorised bow. It's got a speed knob and power switch running a small RC car motor with a soft dremel bit stuck on the end. The dremel bit bows your guitar strings and the motor makes enough magnetic noise that it renders the thing almost useless. However it's fun to muck around with, especially for noise stuff.
This is a nifty little thing I made to switch the order of two pedals in series. It's really handy for using the same pedalboard twice in a row with a looper. The jacks are In, Send A, Return A, Send B, Return B, and Out. The switch toggles the order between AB and BA. Very useful for testing things at home; not so useful out-and-about. It comes in handy.

This is my usual amp setup: a Laney RB3 bass amp (modded for a better DI out), and a Belcat guitar amp that I ripped the amp out of (it was humming and horrible) but now it's a great cab. The speaker isn't the best in the world but I've settled for worse. I either run this cab from the bass amp or from the little Fender below. The advantage to a setup like this is that it's full-range; the bass speaker can handle lots and lots of bottom end but doesn't handle the highs with any grace; while the guitar cab doesn't represent bass well but has great highs. Between them I can get a lot more colour and variety than anything a single speaker could handle.
I need more though. I really want to crank up a single guitar through a whole music shop full of amps. Set each one really quiet and just enjoy the variety, depth and complexity of a meticulously amplified tone.
This is my awesome little Fender solid-state. It's technically a practice amp but it's so loud I've never really needed anything bigger, out-and-about. I've cooked it slightly over the years so it doesn't quite play clean anymore. I haven't done much modswise yet but I've got a lot planned. I was held up for a while by not having the schematic. I re-grilled it with some patchwork fabric from Mum.

The speaker ovveride jack disconnects the internal speaker and allows you to use other cabs instead. I might put in another jack later that allows you to use two speakers in parallel. The springtank is a recent addition; it isn't hooked up yet. I'm gonna make a couple of little gain stages to drive it a bit harder, cut the main PCB at opamp U83, and insert an FX loop. This means more drilling through the tough steel chassis for more jacks, but it'll be really useful to be able to have the inbuilt reverb either before or after the FX loop. It'll also allow me to bypass the amp's preamp and play straight into the post-amp, which is a lot of fun.
This was a long read but I hope it gives you a good picture of my skills and designs in their current state.


