Overview
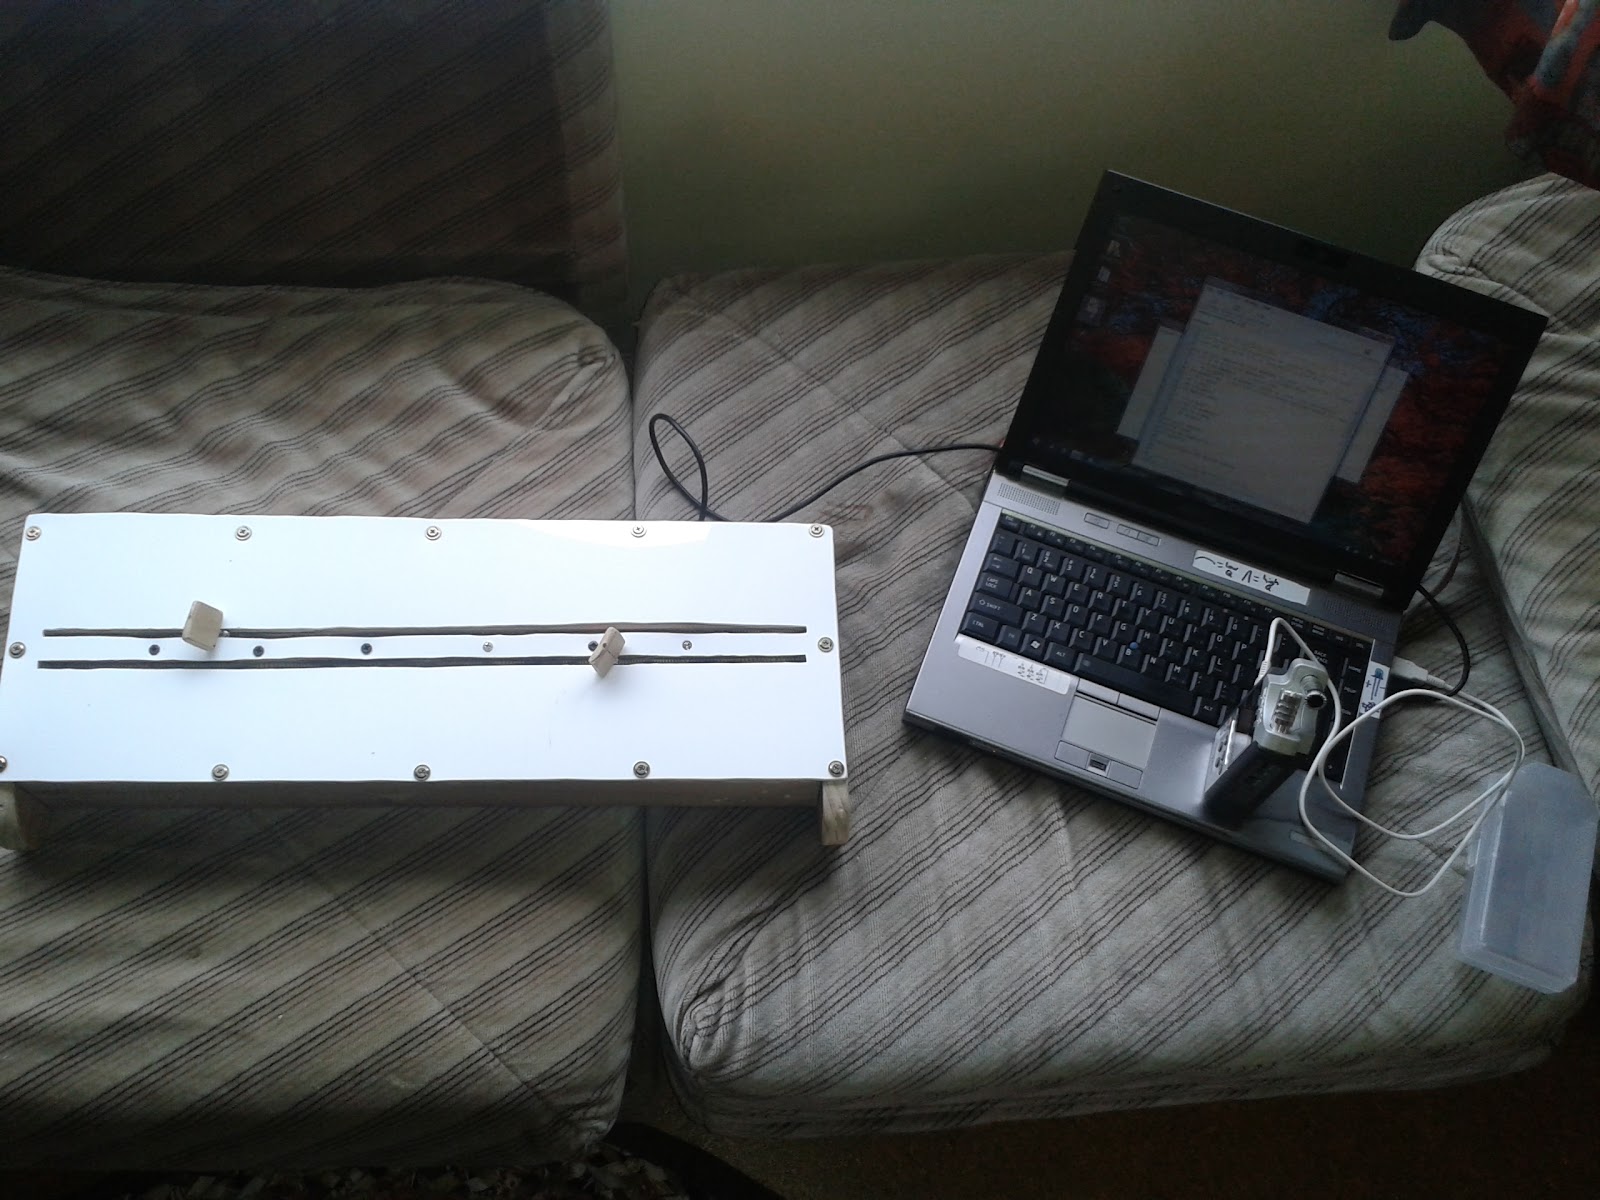
The Headphone Array is an interactive sound installation. Users are invited to come, plug their headphones in, and listen. The more people that plug in (maximum of nine) the more interesting the music becomes: With each new user, an extra layer of music is added. It doesn’t matter which jack you plug into; they are all identical. The project aims to reduce the solitary isolation of headphone listening and create a memorable and interactive experience.
The box itself is powered by an Arduino Uno with sparkfun’s mp3 shield and a behringer headphone amp. The music is written in ChucK and Reaper, using simple synthesis and compositional techniques.
Motivation
A common way to listen to music these days is to carry a select bunch of songs with you, and listen to them through headphones or earbuds. Like many things in a commercial/industrial society, this isn’t a bad way to do it; but it’s lacking several things. While portable, this listening style prevents people from listening together (splitters do exist but they’re not particularly common), and the music is not locked to a particular location. Memories of music in particular places or situations are often stronger than the music you can take with you: Live gigs will stay with you the rest of your life, but you’ll forget about that song you listened to on the bus this morning as soon as you get to work.
This project aims to repair some of those emotional ties that have been lost with modern headphone-based listening by fixing the sound to a particular location (wherever it is installed) and by making the piece interactive and collaborative (the prescence of each listener alters the sounds). Listeners are encouraged to interact with the installation on their own terms (i.e. with their own headphones) and also to interact and listen with one another.
Related Works
It is difficult to find other sound installation works as they are few and far between. However, two pieces were critical in the formation of this project: Mort Garson’s Plantasia album, and Tristan Perich’s 1-Bit Symphony. The best way to describe Garson’s work is ‘lovely’. It consists almost exclusively of beautiful analog 70s synthesisers, arranged in pretty rhythmic patterns. There is a certain kind of peace to the music; it claims to be music for plants and exhibits a certain kind of emotional healing. This is very much a concern of this project; the music must be peaceful and inclusive and just plainly beautiful.
Perich’s 1-Bit Symphony is an algorithmic piece, written for a single small chip mounted with a button cell and a headphone jack inside a CD case. Perich says that just because the sounds present (triangle waves, square waves etc) are simple, that the music itself doesn’t have to be simplistic. His piece is very musically complex, but is entirely based around simple synthesis. This, combined with the headphone listening method, and the fact that the music is tied intricately with the location where it is made (the CD case), makes it stand out among other sonic arts projects.
Both Garson and Perich seek to heal damage that has been done; and they do this by making music that is simply beautiful. This project sought to achieve the same effect, and reinforced it through user interaction and collaboration.
Technical Overview
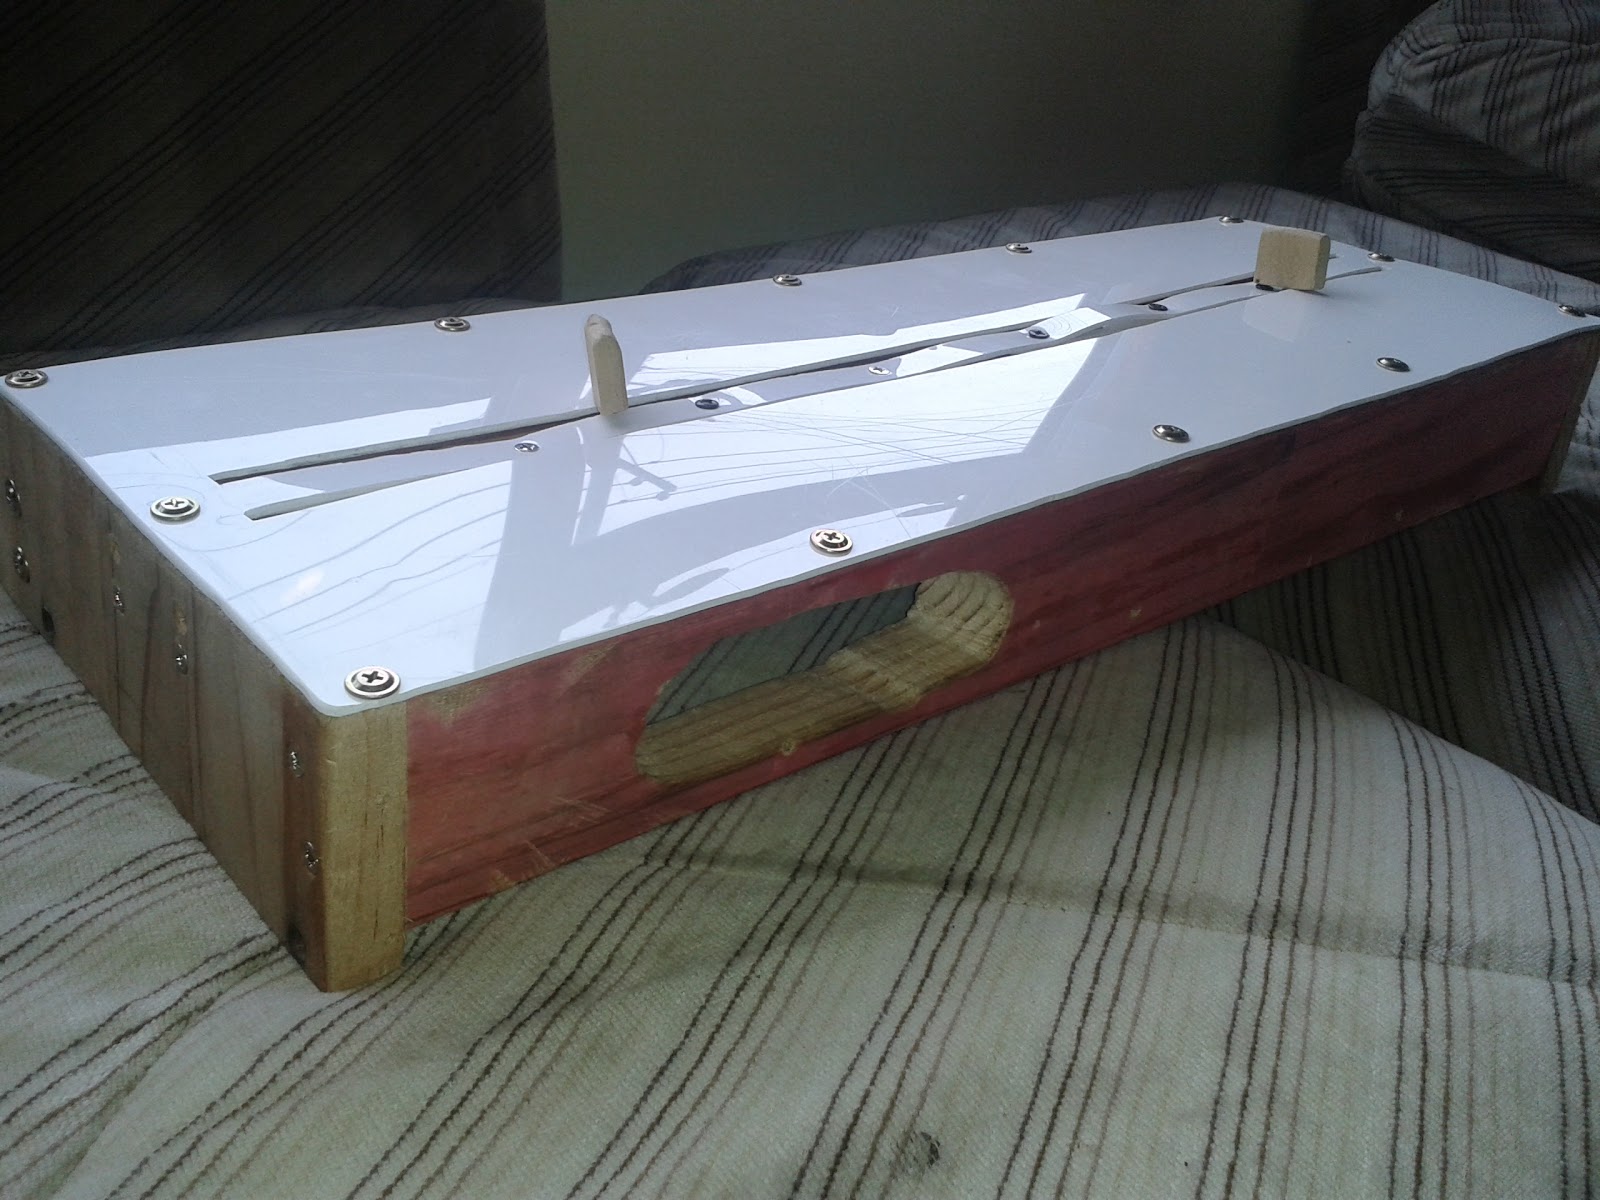
Construction
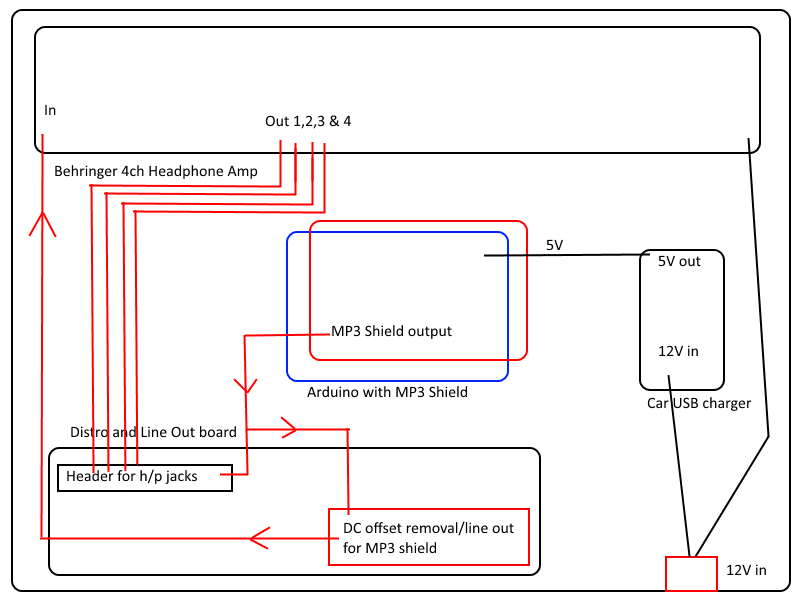
The layout of various circuits in the box.
Components:
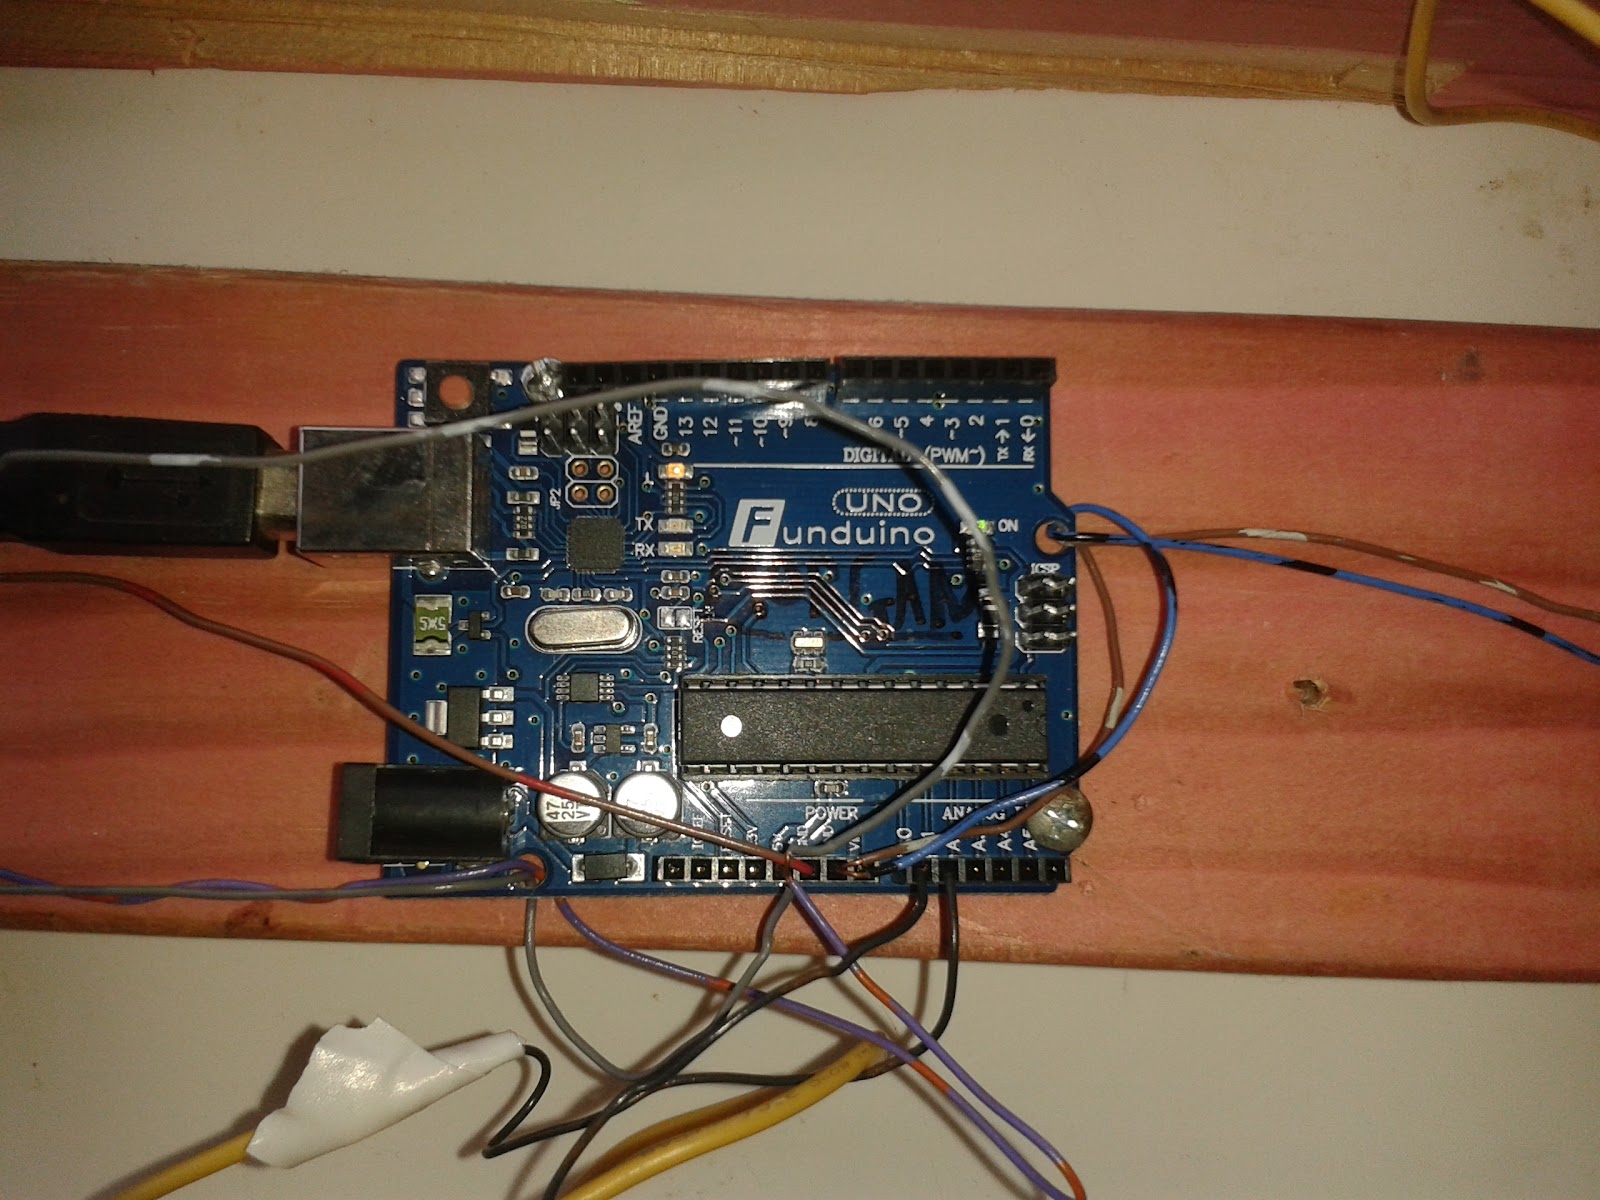
Arduino with MP3 Shield
Distro and Line Out board
Behringer HA400 Headphone Amp
Car USB Charger
9 Headphone jacks, each one with a momentary button hot-glued to the back of them (such that the button pokes into the back of the jack).
Signal Flow
The stereo signal comes from the MP3 Shield, down a cable and some headers to the distro board, where it is split between the line out circuit and one of the headphone outputs (more on this later). From the DC offset/line out circuit, the stereo signal goes across the box to the Behringer headphone amp. This amp splits it into 4 and amplifies/buffers the signal, which goes back across the box (4 separate cables, each with L,R, and ground) back to the distro board, where each channel from the amp is split and sent to two of the headphone outputs. With 4 channels on the amp and each one powering two headphone outputs, the extra headphone output was simply powered by the MP3 Shield itself.
Each of the headphone jacks has a single 3-core cable (L, R and ground) soldered and hot-glued to it, and ending in a 3-pin male header. These headers all plug into a large 2x14 pin female header on the distro board.
Power
The Behringer headphone amplifier board required 12V, which worked well because 12V-5V converters are very easy to find. A Car USB charger was used to step this down, which was good because while the Arduino’s regulator can technically handle 12V, it gets very hot and can reduce the lifespan of the Arduino. The only problem was fitting everything in the box, which took a few calculated guesses before I got the cable lengths right.
Code
The Arduino is constantly polling the jacks. When a change is read, the Arduino stops the current track, counts how many jacks are down (plugged in), and plays the corresponding track from the SD card on the MP3 shield. Then it goes back to polling. This was surprisingly difficult to implement, and several weeks were spent troubleshooting the code. It compares two different arrays with each loop, and writes one to the other at the end of the loop. Each array is 9 positions long and contains the data from each jack (when I say jack here, I mean the state of the momentary button on the back of it). The ground wires on those jack buttons are daisy-chained together, and the signal wires go to pins 0,1,5,10,A0,A1,A2,A3 and A4. The other digital pins are all used by the synchronous serial system used for communication between the Arduino and the MP3 shield.
The 9 tracks of music were written in ChucK using very simple synthesis and compositional techniques. Midi notes were stored in arrays, which were then fed to oscillators. Various delays and reverbs were used, with the intention of making calming music that drew the listeners in. The tracks were mixed in Reaper.
Line Out System
Because of how the MP3 shield works, the ground of it’s output isn’t actually 0V, it’s actually 1.25V. The hookup guide on the Sparkfun page had a comprehensive guide on how to build a circuit to remove the DC offset:

Future Work
More headphone-specific music needs to be made. Headphones are wonderful things that allow listeners to experience sounds without distracting or annoying anyone around them, and can immerse the listener into a total sound world. The interesting thing about this project was that the music itself is stored on an SD card on the MP3 Shield, so technically any music could be used as long as it fitted on the SD card.